A Hot Process Soap Tutorial: How to Hot Process Soap in a Crockpot
This post is brought to you courtesy of Molly.
When I first started making hot process soap, I searched high and low for a definitive set of steps, like a recipe, that would ensure my hot process soap came out perfectly every time. However, once I understood saponification (the chemical reaction that happens when making soap) and was able to identify the stages of saponification, I became a lot more relaxed about hot process soapmaking.
The main concept of hot process soap is that you are actively cooking the soap (instead of letting it saponify on its own which you do with cold process). Today, we're going to take a tour of hot process soapmaking using a crockpot, focusing on the stages of saponification. I intentionally named this post "a hot process tutorial" instead of "the hot process tutorial" because using a crockpot to make hot process soap is one of many ways to cook soap.
 How to Make Hot Process Soap in a Crock Pot
Making hot process soap is a lot like cooking a chicken. You can cook the chicken really fast over high heat, or you could cook it low and slow like BBQ. Both methods will yield a cooked chicken, and both can result in a tasty meal. However, as a cook, you will likely develop a preference for how you like to cook chicken and probably stick with one method after you have tried a few. Cooking hot process soap is a lot like that!
You can cook soap in a crockpot like we are going to do here, or in a pot on the stove, or in the oven, or even without any additional heat sources. And they will all result in great soap if you are able to identify when the soap is done, and if you manage the heat and water levels properly. In other words, there is no best method for hot process: what matters is that you choose a method you like and you learn how to identify the stages.
My Only Rule for Hot Process Soapmaking
I only have one rule when it comes to hot process soapmaking: never leave your hot process soap while it is cooking. (I have broken this rule a few times and greatly regretted it!) Don't go in the other room to change the laundry or go outside to get the mail. Unattended hot process soap can grow in size (creating a soap volcano), making a huge mess and resulting in a failed batch of soap. If you follow this one rule, you will always be there when your soap starts to volcano, and you can save it, but if you are in the other room on the phone, it can be a messy disaster!
Making Hot Process Soap in a Crockpot
Let's get started on making soap in a crockpot! I like to make my hot process soap in the crockpot on the "low" setting. When you cook hot process soap at a lower heat, there is a lower risk of a volcano.
Like cold process soapmaking, I make my lye solution and allow it to cool for a while (about 15 to 20 minutes). Again, I do this to keep my temperatures low and minimize any chances for soapy volcano.
For this batch of hot process soap, I heated my oils to 150° F (65° C) and added my lye solution after the solution cooled for a good half hour. I like to make my lye solution in a stainless steel pitcher (you can see it in the photo below).
 Getting ready to hot process soap in a crockpot: melting & heating the oils
If you don't want to wait or your lye solution to cool or you want to heat your oils to a higher temperature, don't worry! As long as you don't leave your soap unattended, you will be able to stir the soap volcano down with a large whisk.
You do not want your oils hotter than 180° F (82° C). Warning: If you add hot lye solution to really hot oils in a heated crockpot you will have a huge, super hot mess on your hands. If you are making hot process soap in a crockpot for the first time, I definitely recommend keep your oils and lye solution on the cooler side (below 150° F/65° C).
To check your temperatures without ending up with a messy thermometer coated with caustic material, get yourself an infrared thermometer. An infrared thermometer is probably the only soaping gadget I cannot live without! You have to know your temperatures when you hot process, not just to avoid soapy volcanoes but also to check when the soap is cooked and you want to add your post-cook goodies.
After adding my cooled lye solution to the warmed oils in the crock pot, I stick blend to emulsion. (Not sure what emulsion is? This post about controlling trace in cold process soapmaking will help!) You definitely want the mixture to thicken, but once it is blended, you are done with your stick blender!
After mixing your oils and lye solution together, cover the crock pot to retain moisture and avoid dry spots. I like to cover mine crock pot with plastic wrap (much thanks to Sharon Johnson for teaching me this super cool trick!).
 Getting ready to hot process soap in a crockpot: combining the lye solution and oils, starting the cook!
I always use Stretch-Tite plastic wrap, because it is thicker, holds up to heat, and does not cling to itself. I have tried many brands, and none compare to this one. You can get it at many grocery stores (Publix carries it) as well as Costco. Costco sells huge rolls if you have room to store one that big!
 Stretch-Tite plastic food wrap is my favorite brand of plastic wrap to use when hot processing soap in a crockpot.
The purpose of the plastic wrap is to seal the crockpot to prevent moisture from escaping. If you want to have a fluid soap that you can swirl when hot processing, retaining water is important vital. Some soapmakers use a damp towel and place it under the lid, which helps retain water. However, you need to open the lid to check on your hot process soap during the cook, and doing so with a damp towel will allow the water/steam to escape. That is why the plastic wrap is great: you can watch the soap cook, and even check the temperature with an infrared thermometer without letting any water escape!
For these photos, I opened the plastic wrap to get clearer shots, but normally I would leave it alone until it is done cooking! Some soapers like to stir their hot process soap as it cooks, but I don't because of the evaporation issue. This batch of hot process soap was remarkably less fluid than my normal batches due to taking the plastic wrap off, confirming that one should keep that lid on tight!!
 Making hot process soap in a crock pot: The edges gelling!
Now, the fun part: waiting!
After your blend your oils and lye solution to an emulsion, the raw soap mixture will be opaque (meaning you cannot see through it). It is usually a cream color (like butter!), but the color can vary depending on the oils used.
As the soap cooks in the crock pot, it will start to gel along the sides of the crock pot, because that is where the soap is hottest. You can tell the soap is gelling because it becomes translucent (which means you can kind of see through it and it looks like jelly). Once the soap is fully gelled, it is done cooking!
Using the chicken example before: you know you want to cook chicken to an internal temp of 170° F (76° C) so you can remove it from the heat slightly before and the residual heat will continue cooking the chicken. With hot process soap, you can also remove the soap from the heat before it is fully cooked, knowing that the residual heat from the crockpot will finish cooking the soap!
Once the majority of the soap is gelled, I take the crockpot out of the base, remove the plastic wrap and give it a stir. After mixing the hot process soap, I will check the temperature with my infrared thermometer. In most cases, the soap will temp between 200° F (93° C) and 220° F (104° C).
If you wanted to put the soap in the mold at this point, you can. Even if the soap is not fully gelled, it will finish saponifying in the mold which is why I don't stress about confirming if the soap is fully cooked via a zap test or pheno. It does not matter: it will finish itself off in the mold!
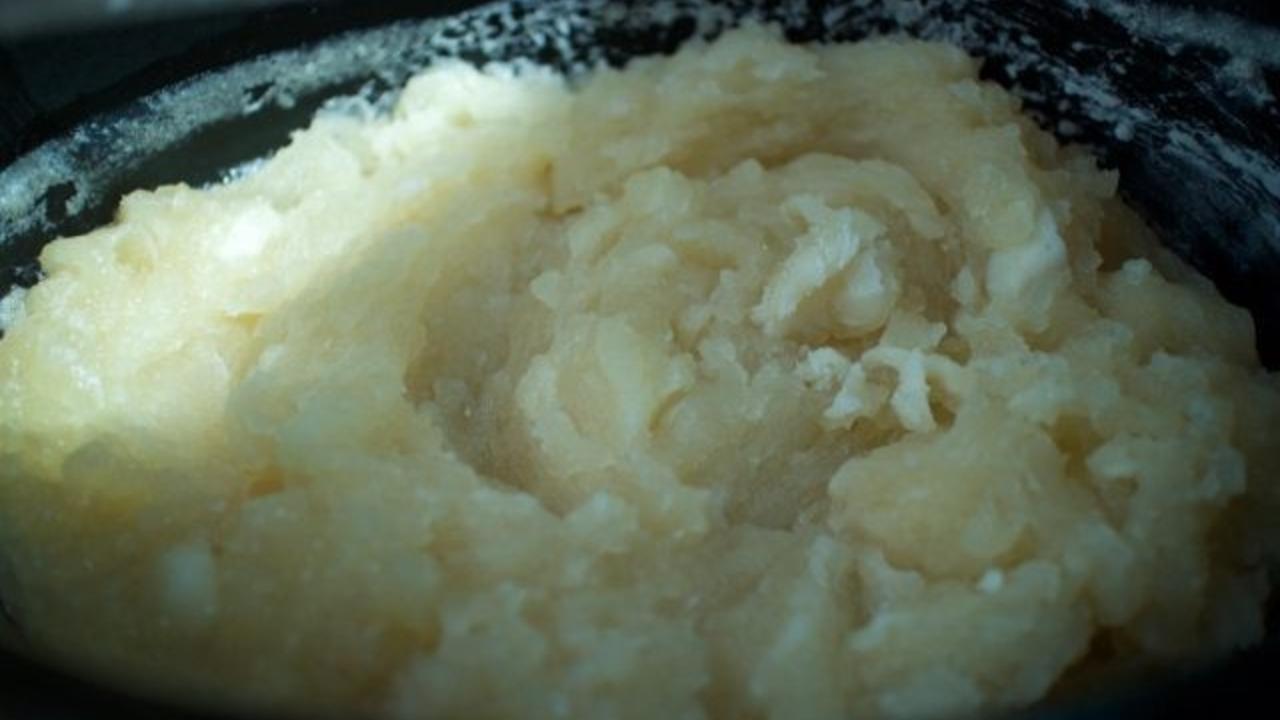
 Making hot process soap in a crock pot: gelled soap!
Wait, what is a zap test? A zap test is an old-fashioned way to check a soap mixture for the presence of lye by touching it to your tongue. If it feels zappy or sharp, like touching a battery to your tongue, it's not done yet. While I have done a zap test, I don't recommend it at all! Not only does soap taste bad, but it is dangerous and can give you a chemical burn or thermal burn if the soap has too much lye present or is too hot. (The zap test is also a safety, liability, and GMP nightmare for soap business owners, with or without employees.) I much prefer to go by temperature and look rather than risking my tongue!
If you want to add any fragrance or additives like honey or goat milk, you will want to let the soap cool down before adding them. Adding honey or goat milk to really hot soap can cause the sugars to scorch, and the soap will turn brown. If you add a fragrance to soap that it is too hot, it can vaporize and your soap won't have as much scent. Your soap room will be heavily scented though! Ask me why my husband made me promise to never make patchouli soap again early on in my hot process days. ;)
Okay, I know what you are thinking: flashpoints. I'm sure you have heard or seen it before: I have to add my fragrance when the soap temp is lower than the flashpoint. Let's clear this up!
I went through a phase last year where I was determined to understand the relationship between soap temperature and flashpoints. I will jump to the end of this exciting story: flashpoints are solely for the safe storage and shipping of fragrances. (Kenna also mentioned this in a previous article about common questions about using essential oils in soapmaking!) A flashpoint refers to the temperature at which the fragrance will combust from an open flame. In my experiences making hundreds of batches of making hot process soaps, there is no relationship between the specific flashpoint of a fragrance and when to add to soap.
However, fragrance oil and essential oil will both vaporize a bit (or a lot) if you add them when the soap is too hot (200° F or 93° C and higher) so if you want your scent to stick, let the soap cool to less than 180° F (82° C). This can take some time, so cover your soap back up with plastic wrap and wait. (And yes, it is okay at this point to leave your soap unattended for a bit if you need to!)
 Hot process soap with all my goodies added in!
Once the soap cools, add your superfat, goat's milk or whatever other post cook goodies you want to add. We will talk more about swirling and additives in future articles, but this is also the point where you would divide your hot process soap for coloring.
If I want a fluid hot process soap, I will add yogurt after the cook (at the rate of 1 tablespoon per pound of oil). I have used greek yogurt and regular full-fat yogurt, and prefer the regular yogurt because it is more fluid and easier to blend in. You should discount your total amount of water for your lye solution to account for the yogurt, just like you would in cold process soapmaking. For example, if your recipe calls for 10 oz of water and you want to add 1 ounce of yogurt, you will only use 9 ounces of water for your lye solution. Be careful here though: you must have as much water as you do lye for the lye to fully dissolve in your solution! After adding the yogurt, I cover the crock pot again with plastic wrap and let it rest for a minute. You will be amazed at how much more fluid it is after the yogurt does its thing!
Here's my top tips if you are getting ready to make your first batch of hot process soap:
- Keep it simple. Use only one color, or no color, so you can focus on the process itself. Add your superfat after the cook, but avoid honey and milk for now.
- Use a loaf mold or a slab mold for your first batch! Using a loaf or slab mold rather than individual cavity molds will give you more room to mold the hot process soap.
- Use a recipe that you have tried in cold process soap before and liked. You may even want to compare the soap recipe made the two different ways!
- Keep your eyes on your soap! Watching the soap gel along the outside of the crockpot will really help you with hot process soapmaking by being able to identify the stages.
- Don't stress about whether the soap is completely cooked before taking out of the crock! It will finish cooking in the mold and overcooked soap is a lot like overcooked chicken. No bueno!
- Don't leave the soap alone until it is done cooking and you are waiting for it to cool down.
I hope this helps you rock your first hot process soap in a crock pot! Next time, we will dive into swirling hot process soap! Feel free to leave a comment below with any questions you have regarding hot process soapmaking so that I can cover it in the future!
Want to snag weekly advice on building a successful soap biz directly in your inbox?
Of course you do! Sign up for our newsletter below for more tips and tricks to make bank in your biz.
