My Favorite Cold Process Soap Design Technique: Gradient Layers
Cold process soaps with gradient layers feature an ombré color styling design that became a huge trend in 2012 in fashion, interior design, and beauty. They are, by far, my favorite design technique to use in soapmaking as they can be striking, modified to change up the whole design, and are relatively easy to scale from small batch soap production to big batches of soap.
 My Favorite Cold Process Design Technique: Gradient Layers
This soap design features layers of flood-filling that range in color from lightest to darkest (gradient) color schemes to color transition schemes.
The Method to the Madness: Gradient Layers Soap Design
Light to dark (or dark to light) designs choose a base color to change the level of color saturation throughout the soap.
Determine in advance how many layers of soap you will be flood filling and the base color.
You will begin with your main soap batter, uncolored or colored with a white colorant depending on how white your formula is on its own.

My husband's first soap featured gradient layers!
Premix your base color, which is your darkest color, in oil or glycerin. You want to use the highest saturation of colorant in this premix base, as it will be the only colorant you use for the entire batch.
However, it will be concentrated in your bottom layers so please keep that in mind (avoid colored lather!)
My husband's first batch of soap was a gradient layered soap using tangerine mica and titanium dioxide.
He used 2 teaspoons of tangerine mica in a 10 bar batch of soap, premixed with a small amount of his soaping oils (just enough oil to cover the mica, and then well mixed) in a spouted 4 cup measuring cup.
After emulsifying his oils and lye solution, he colored the full batch with a half teaspoon of titanium dioxide and added approximately a fifth (1/5) of the full batch to the measuring cup containing tangerine mica.
After incorporating the soap with the mica, he poured 3/4 of the orange soap into the bottom of the mold – leaving 1/4 of the orange soap in his measuring cup.
Again, he mixed another fifth of his batch of soap in the measuring cup, effectively lightening the orange soap to a lighter orange. Using a spatula, he flood filled the next layer using 3/4 of the mixture in the measuring cup.
He continued in this manner until he reached his lightest color. It's such an easy design technique that even a beginner pulled it off. ;)
Gradient Layers Tip: This method can be used in reverse, by coloring the main batch, and using Titanium Dioxide as your base layer color. (Lightest soap on bottom, darkest on top.)
The number of layers can be varied by however many layers you are confident in accomplishing. The biggest thing to remember is to keep some of your colored soap in your measuring cup/pouring cup to color the next portion/layer.
 An example of how to use a spatula to flood fill layers
Gradient Layers Tip: Use a spatula or other flat device to assist in flood filling, it helps to prevent layer breakage when using soap that is a lighter trace.
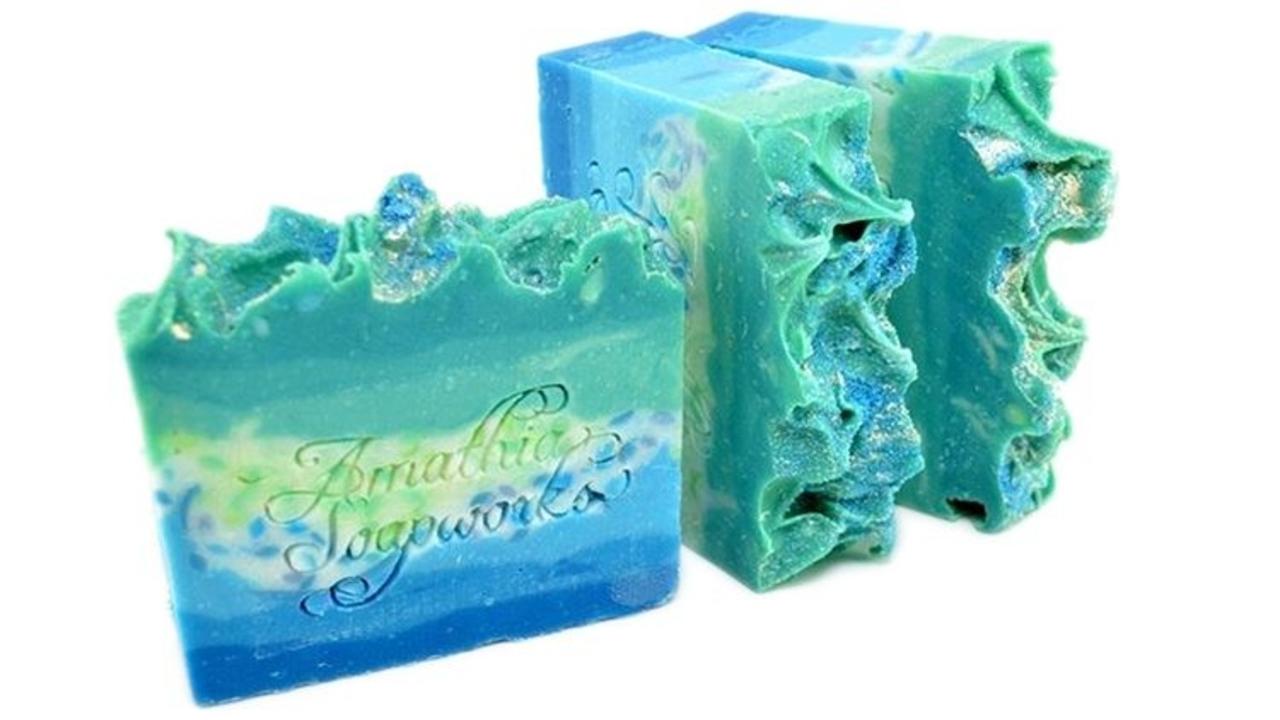
Using Gradient Layers to Color Transition in Soap Design
Color transition designs incorporate the light to dark techniques of gradient layers with adding additional colors into the mix. Instead of just layering from light to dark, a color transition design often incorporates two or more colors to the gradient.
![]() An example of gradient layers used to color transition a soap design
An example of gradient layers used to color transition a soap design
In this example, I used blue and green as my base colors and incorporated middle layers of white soap with colored soap shreds.
I used two base colorants, the blue and green, in two measuring cups. I colored my full batch with titanium dioxide. I also placed the green soap shreds in another measuring cup, and the blue shreds in a separate measuring cup.
 Use a salad shooter to make quick work of shredding soap for embedding
Creating Embeds Tip: A Salad Shooter is an electric grater that makes quick work out of shredding soap for embedding without putting your knuckles in jeopardy with a metal grater! It's one of my favorite soapmaking tools on my recommendations list, available in Soapmaker to Moneymaker.
After emulsifying my oils and lye solution, I added titanium dioxide to my full batch and poured approximately 1/4 of my full batch into the two cups containing soap shreds. After mixing the white soap into the shreds, I poured about 1/6 of my remaining batch into the cup containing my blue colorant.
Following the directions for the light to dark soap design, I layered my blue soap from darkest to lightest. Next, I flood filled using the cups of soap containing the soap shreds for my middle layers.
Finally, I added about 1/3 of my premixed green mica & oil solution to my full batch for the lightest layer. After flood filling the light green layer, I added more colorant to the remaining batch, for a darker green. Again, I flood-filled my next layer and then added the remaining amount of colorant mix to the batch.
Adding the remaining soap to the top layer completed the design.
Interested in following a full tutorial for gradient layers, with a recipe and all? I've got you covered with this transitional color design featuring four-color layers in pastel fashion!
Want to snag weekly advice on building a successful soap biz directly in your inbox?
Of course you do! Sign up for our newsletter below for more tips and tricks to make bank in your biz.
