How to Make Your Camera Settings Work for You
Fiending for that fancy camera? Or have one in the closet that you never quite got the hang of? From ISO to f-stop, we are here to help you! Let's get up close and personal with your camera settings.

(Most of this info is going be focused on DSLR cameras, but a general understanding of how cameras work will still help you better use your smartphone camera or point-and-shoot models.)
Aperture (aka F-Stop)
Aperture, sometimes referred to as f-stop, controls how much light the lens is letting in.
The thing that is confusing for a lot of people is the aperture being a low or high number is the opposite of how open the lens is. It seems counter-intuitive but if your f-stop is a low number, that means the lens is open wide and letting in lots of the available light. In contrast, the higher the number, the smaller the opening is. So, much less of the available light is being let in.
The lower the f-stop, the more shallow the depth of the field. Ya know those cool photos, where the background is blurred and the front is in focus? For that type of photo, you step down, which means use a lower f-stop. (Tilt-shift, a popular Instagram filter, mimics this effect).
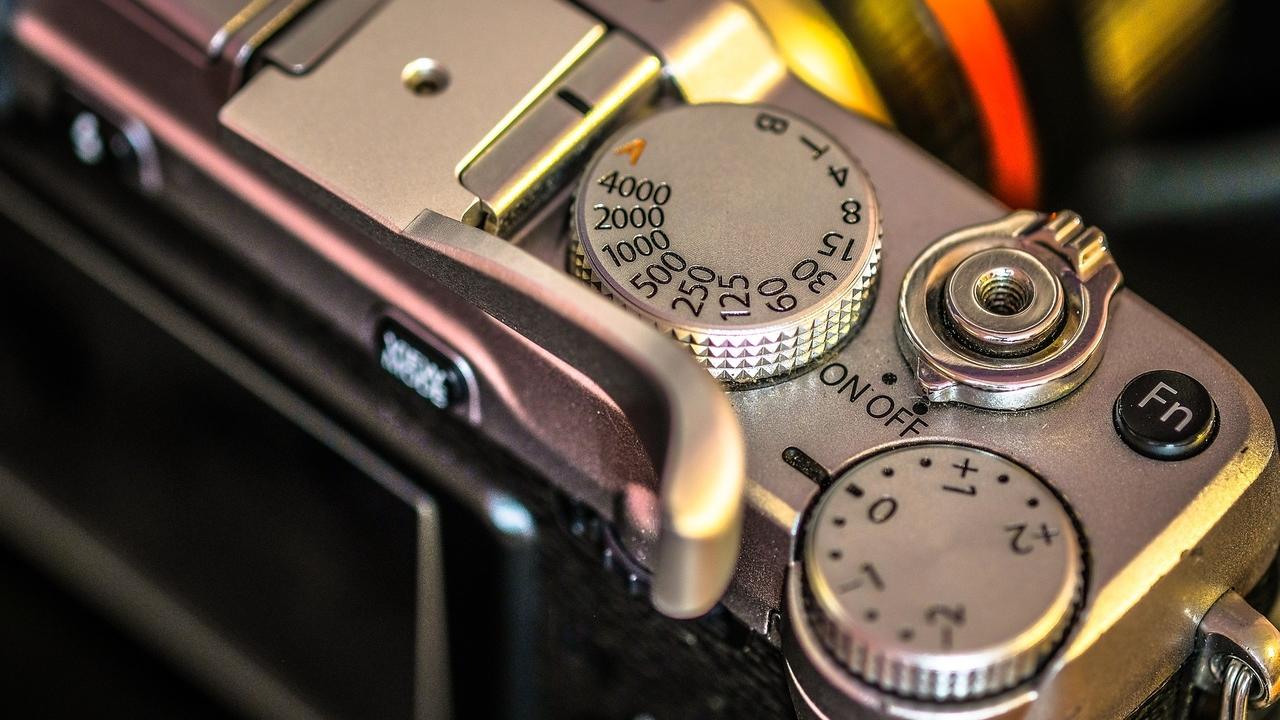
Slow and steady or fast and furious? Shutter speed...
The camera setting that determines how quickly the shutter opens and closes when capturing images, is called (duh!) shutter speed. The shutter speed numbers are a measurement of seconds. If it’s 1/100th, it’s 1/100th of a second. If it’s 1/3200, it’s 1/3200th of a second. And so on. The amount of light and movement of your subject determines the shutter speed you should use. With product photography, you can use slower shutter speed to let in more light.
Keep in mind, all of these settings work together to get the image you want. For example, when using a slow shutter speed (long exposure), you will be able to use a smaller f-stop (smaller opening).
The longer the exposure, the more chances for you to wobble. If you want to experiment with longer exposures (depending on your camera, up to sixty seconds), be aware of the limitations of the human body and pop your camera on a tripod. In addition, use a handheld remote or a timer so you’re not touching the camera at all
What is ISO?
Next on our list of settings is ISO. It was a big deal in film photography. For that reason, it has been translated to digital cameras. A smaller ISO is going to give you a smooth, cleaner image. A higher ISO is going to give you more grain and noise in a photo.
Your ISO setting should be chosen based on available light. Remember taking photos on film twenty years ago? Images taken in low light would sometimes look really grainy and icky. That’s because the ISO was set too high for the amount of light that was available.
Many cameras have a shutter priority setting, a half manual setting on a camera that allows you to choose your shutter speed and your ISO and then it compensates for those settings. For product photography, you may never use this setting. It will be easier to capture fine details if you shoot at a low ISO and adjust your other settings for light or movement.
Feeling exposed?
Let's talk exposure. In underexposed images, the shadows are too dark and details in those areas are lost. Overexposed images will have highlight areas that are too bright where detail is lost. Good, even exposure will let you see details in every part of your photo!
Cameras have an internal light meter that helps you see how exposed an image is. And most have an exposure compensation mode that will try to improve imperfect conditions with a little bump one way or the other. As much as possible, make needed adjustments to your lighting rather than using camera tricks. Exposure compensation is for last-ditch efforts only.
Graphing your photograph
Are you familiar with histograms? They’re a measurement of the number of pixels in an image that falls in areas of shadow, mid tones, and highlights. If you have histograms on your camera, these are a great resource for understanding how much light is happening in your photos. You want a nice curve across the graph, like a bell. The far left represents shadows and the far right represents highlights. Those will be your lower areas. But, you want a nice curve in the middle, representing your mid tones. A perfectly curved histogram means your image is neither underexposed nor overexposed. In addition, it is going to have a nice range of colors and be full of detail.
Focus!
Your camera probably has focus modes that you can turn on. Basically, focus modes are ways for you to control what is coming into and going out of focus in your camera. Most cameras, whether point-and-shoot, smartphone camera, or DSLR default to an autofocus mode. That means the camera automatically picks a point in the image and focuses on it. With a DSLR, you have the option of changing focus modes. Changing them up makes it a lot easier to get the right section of your image into focus.
In a flash (or not!)
Let's wrap things up by talking about the onboard flash. Every camera has an onboard flash. Don't use it! It will flood your image with a lot of extra light, often causing overexposure.

Do your homework!
Whew! That's a ton of info right? DSLR cameras, especially, can get really complicated. However, each of them come with a detailed manual. It’s really important that for each individual camera, you read through the manual first to learn how to manage the settings. If you are going to invest all that money, invest the time to study up and make it worth it!
Knowing your camera settings is a great start but just the tip of the iceberg when it comes to great photography. Want to really up your game? Purchase The Moneyshot, our product photography 101 class, from The Nova Studio. The class includes a 3-hour video and 6 digital Handouts: a shot tracker, a photography cheat sheet, a reference sheet, a vocabulary list, a resources list, *PLUS* a transcript of the video.
Do you feel a little more confident picking up your DSLR now? Does yours have a setting, mode, or feature that we didn't cover? Tell us in the comments.
Want to snag weekly advice on building a successful soap biz directly in your inbox?
Of course you do! Sign up for our newsletter below for more tips and tricks to make bank in your biz.
